Google Indexing API Setup: Your First Notification

Start with one eligible URL, such as a real job listing at https://example.com/jobs/42. Google supports the Indexing API for JobPosting, or BroadcastEvent embedded in VideoObject. Ordinary blog posts need URL Inspection or a sitemap instead.
Google's default quota covers onboarding and testing. Usage and resource provisioning need additional approval; use the form linked from Google's approval page.
Set up credentials and property access
Google's prerequisites separate Cloud setup from Search Console ownership. Complete both before running the script.
Enable the Indexing API
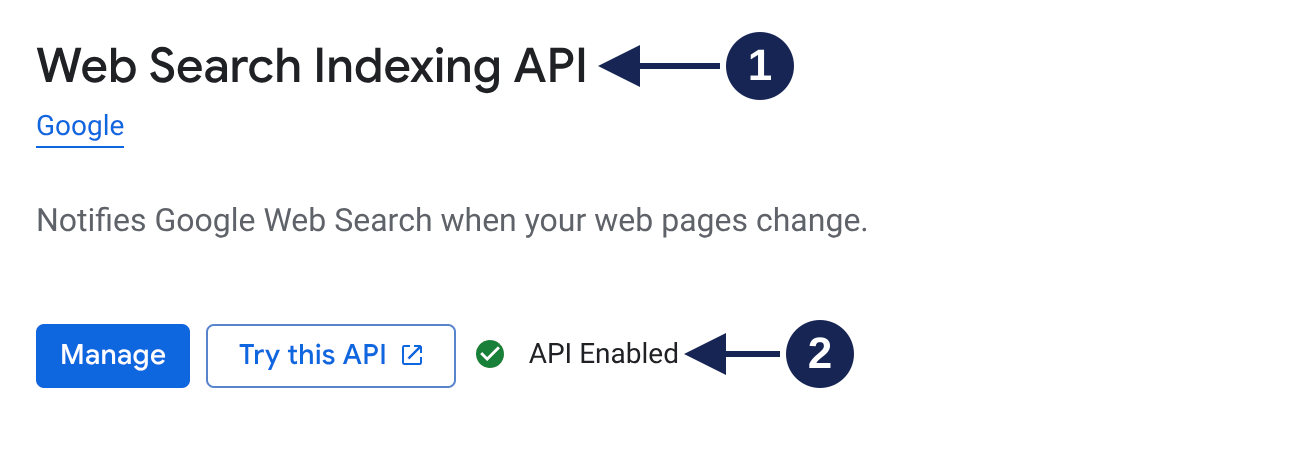
Create or select a Google Cloud project. In the API Library, find Web Search Indexing API (1) and enable it for that project. If the API is already enabled, you will see Manage and API Enabled (2).
Open the API status at full size.
Create the service account and key
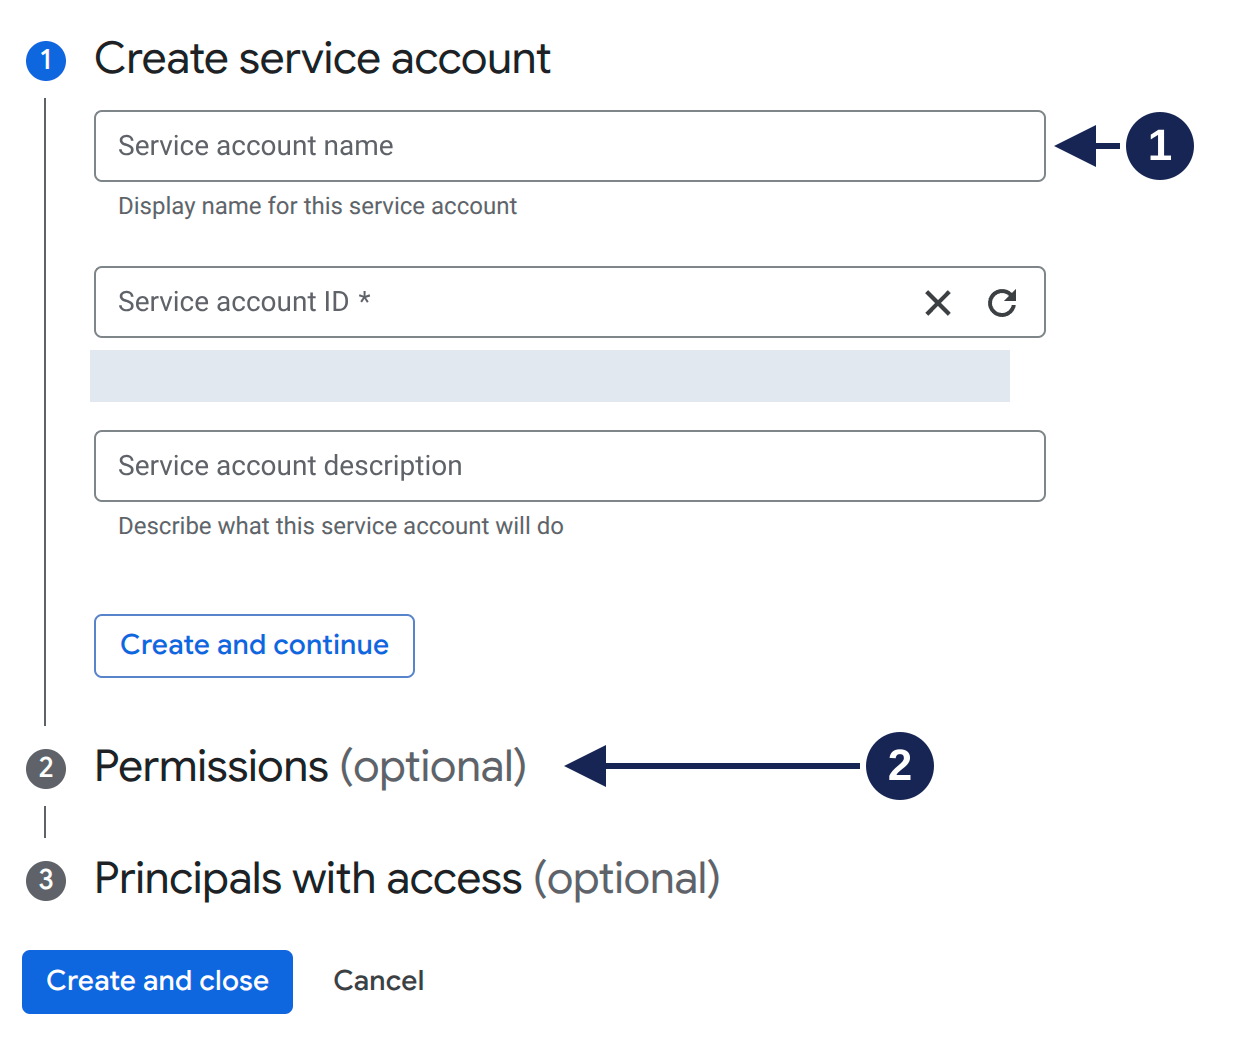
Open IAM & Admin → Service Accounts → Create service account. Give the account a name (1). The Permissions (optional) step (2) grants Cloud IAM roles; it is not required for this Indexing API setup.
Open the service account form at full size.
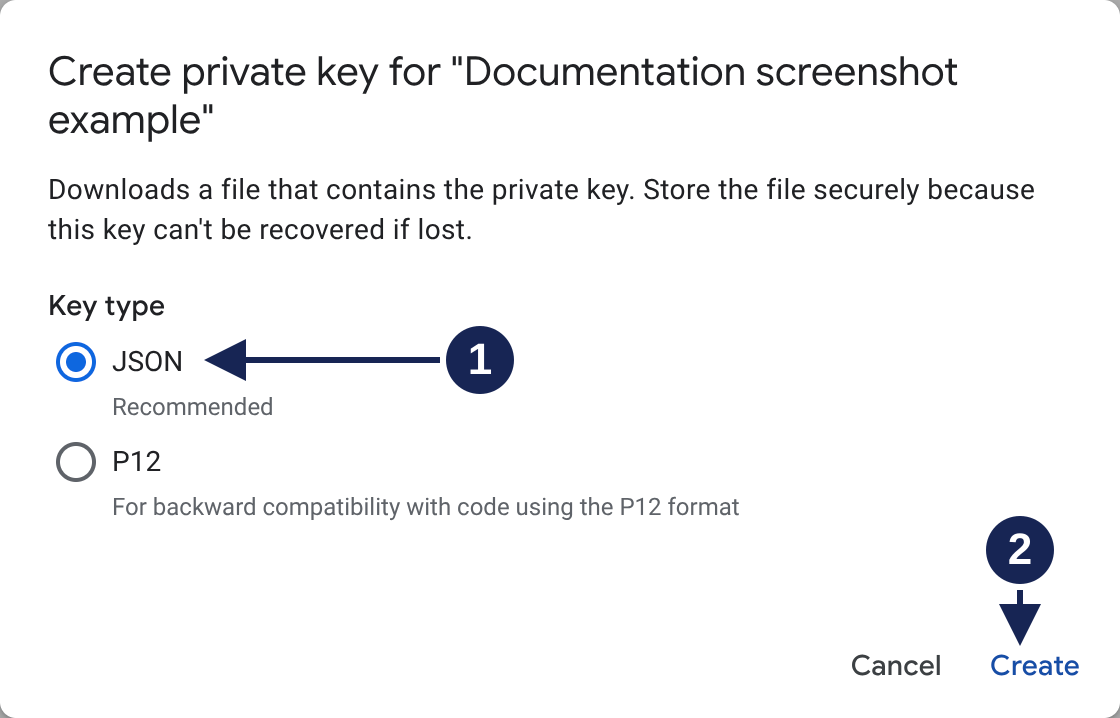
After creating the account, open its Keys tab and choose Add key → Create new key. Select JSON (1), then Create (2) to download the key file.
Open the key dialog at full size.
Google's key creation guide covers this step. Keep the downloaded JSON file outside Git, browser code, and public directories.
Grant Search Console ownership
Verify ownership of the matching property in Search Console. Open Settings → Users and permissions → Add user.
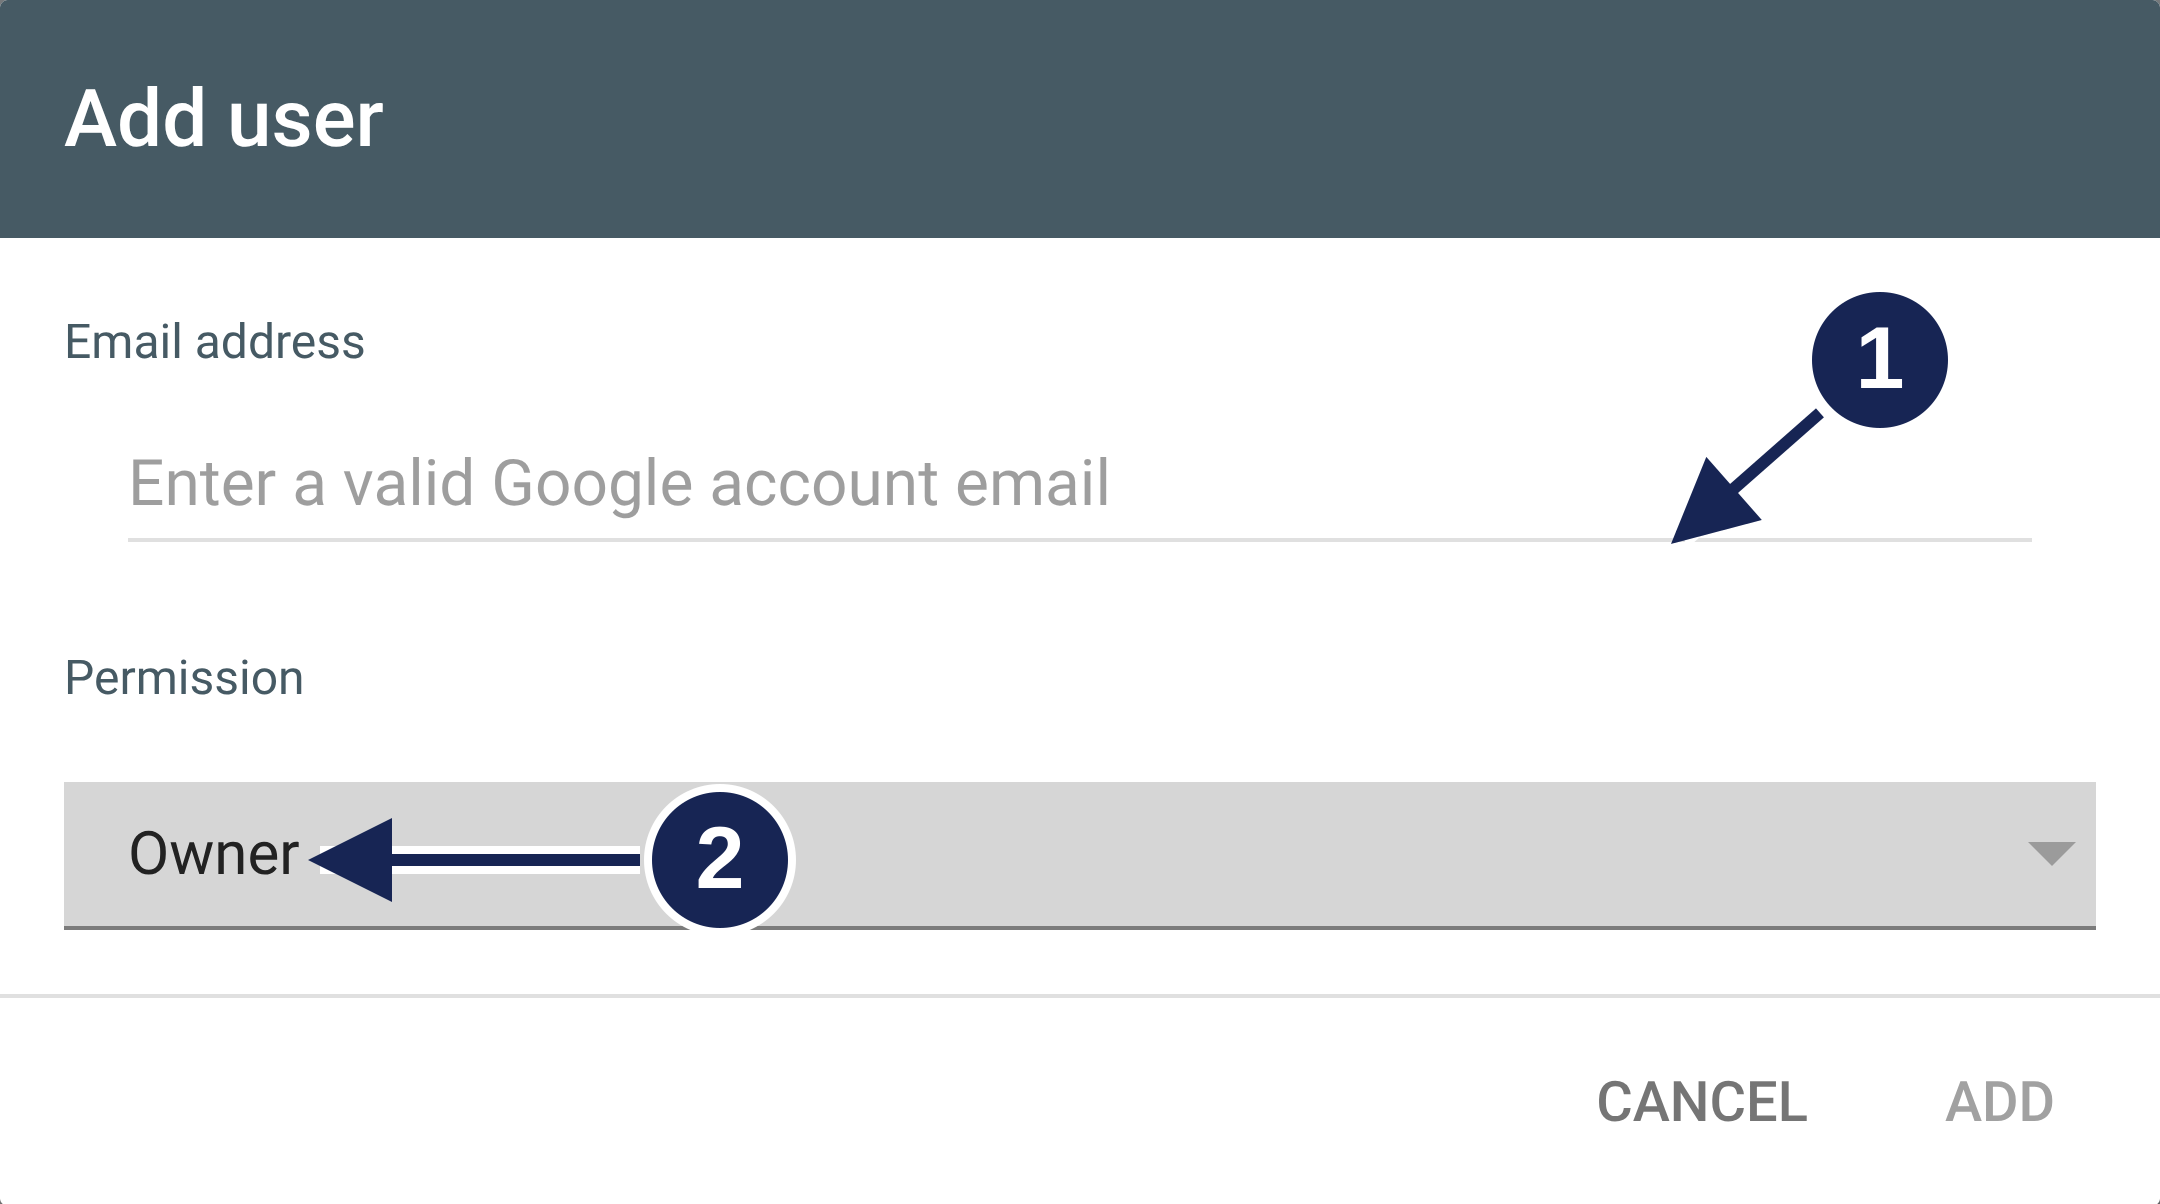
Enter the service account's client_email in Email address (1). Select Owner under Permission (2), then choose Add. This grants delegated ownership, as required by Google's owner setup.
Open the permissions dialog at full size.
Being a Cloud project owner does not grant ownership of a Search Console property. Check the property covers the URL you intend to notify Google about.
Send the first notification
Use Node.js 24 and Google's official googleapis client. In a new local directory, install the tested version and point the credential variable at your JSON file:
npm init -y
npm install googleapis@181.0.0
export GOOGLE_APPLICATION_CREDENTIALS="/absolute/path/to/service-account.json"
Save this as notify.mjs:
import { google } from 'googleapis'

const url = process.argv[2]
if (!url) {
  throw new Error('Pass one eligible URL: node notify.mjs URL')
}

const auth = new google.auth.GoogleAuth({
  scopes: ['https://www.googleapis.com/auth/indexing'],
})
const indexing = google.indexing({ version: 'v3', auth })

await indexing.urlNotifications.publish({
  requestBody: { url, type: 'URL_UPDATED' },
}, { retry: false }).then(({ data }) => {
  console.log(JSON.stringify({ status: 'notification-accepted', url, metadata: data }))
}).catch((error) => {
  const details = error.response?.data?.error
  console.error(JSON.stringify({
    status: 'request-failed',
    url,
    httpStatus: error.response?.status,
    reasons: details?.errors?.map(item => item.reason),
    message: details?.message ?? error.message,
  }))
  process.exitCode = 1
})
Run it with your eligible URL:
node notify.mjs 'https://example.com/jobs/42'The example uses GoogleAuth's credential discovery and the indexing scope. The .mjs extension makes the file an ES module. Replace the example URL with a page you own that meets Google's supported-content requirements.
Read the response correctly
notification-accepted is the script's label for a successful API response. It does not mean the page was indexed. Google may attempt a recrawl after receiving URL_UPDATED; its usage documentation defines that response. To check the listing later, open it in Search Console's URL Inspection tool, or run a quick site: search for it with the Google index checker.
Google Search timelines explains why an accepted notification does not set an indexing deadline.
On failure, the script prints the status, reasons, and message. Read them together, because an ownership problem and an exhausted quota need different fixes. The script disables automatic retries, so it will not keep submitting while you diagnose the problem.
Verification used the real client with intercepted HTTP responses. Credential exchange and live Google notifications remain untested. For metadata and error handling details, continue with the Node.js guide. For approval and rate limits, use the quota guide.
Google Indexing API Quotas: Which Limit Applies?
Check project quotas, Pacific Time resets, approval requirements, and per-request errors without confusing Google's limits with a tool's own limit.
Can You Use the Google Indexing API for Blog Posts?
Ordinary blog posts are outside Google's supported Indexing API use. Learn when to use URL Inspection or a sitemap, and what an accepted request proves.